
Getting Started
Setting up HRMLESS for the first time. About ten minutes.
1. Create your login
Go to the HRMLESS login page and choose Register. Enter your name, email and a password.
You can also sign in with a Microsoft account if your company uses one.
2. Add your company details
The first time you sign in, HRMLESS asks who you are.
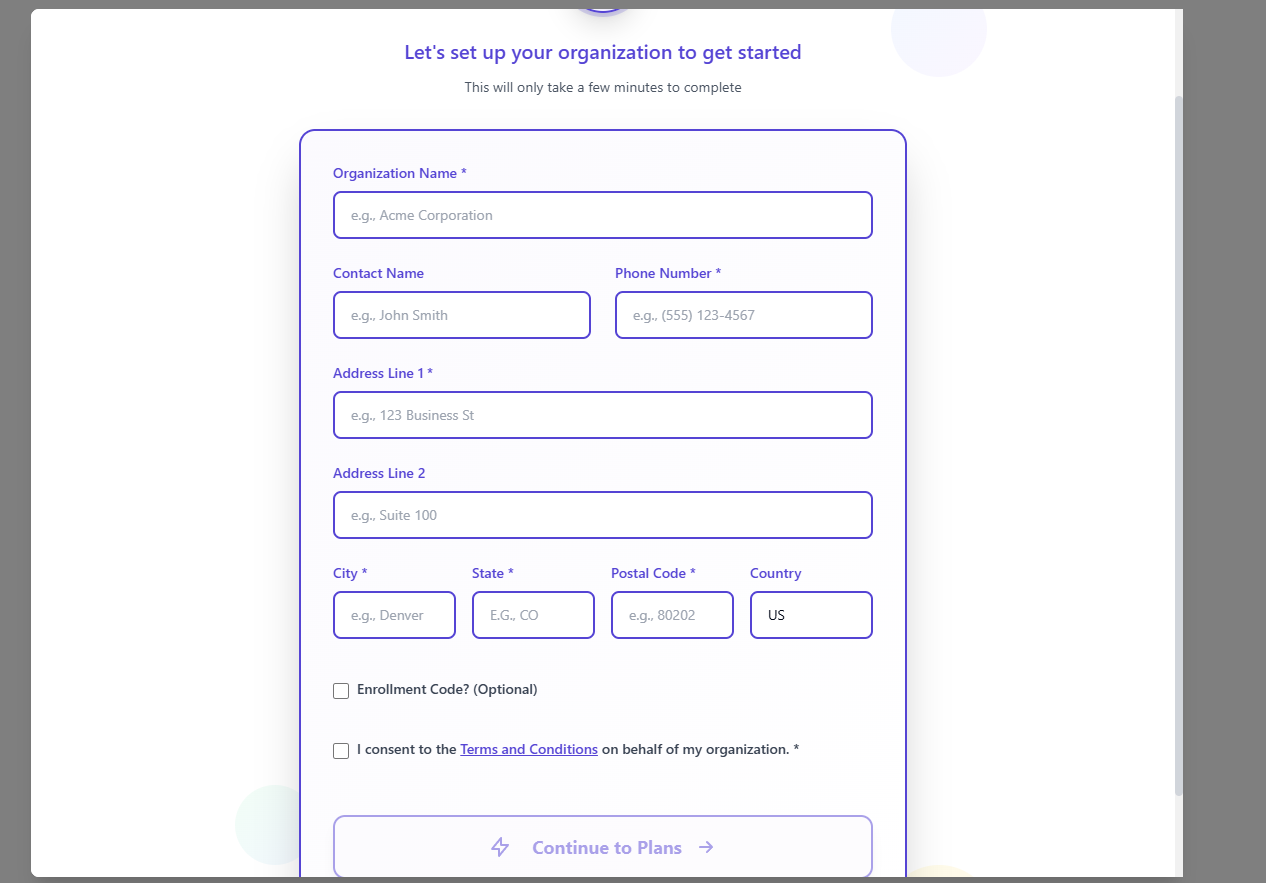
Organization Name, Phone Number, Address Line 1, City, State and Postal Code are required — they are the ones marked with a star. Country defaults to US.
Your contact name and phone number appear in the messages your candidates receive, so use the ones you want applicants to see.
Enrollment Code is optional. Leave it blank unless somebody gave you one.
Tick I consent to the Terms and Conditions, then choose Continue to Plans.
3. Pick a plan and add payment
Choose a plan, then enter your card details on the checkout page.
Finish this in one go. If you close the page part-way through, your account is created but has no plan attached, and you will not be able to use HRMLESS until someone adds one for you.
4. Find your way around
Everything is in the menu down the left.
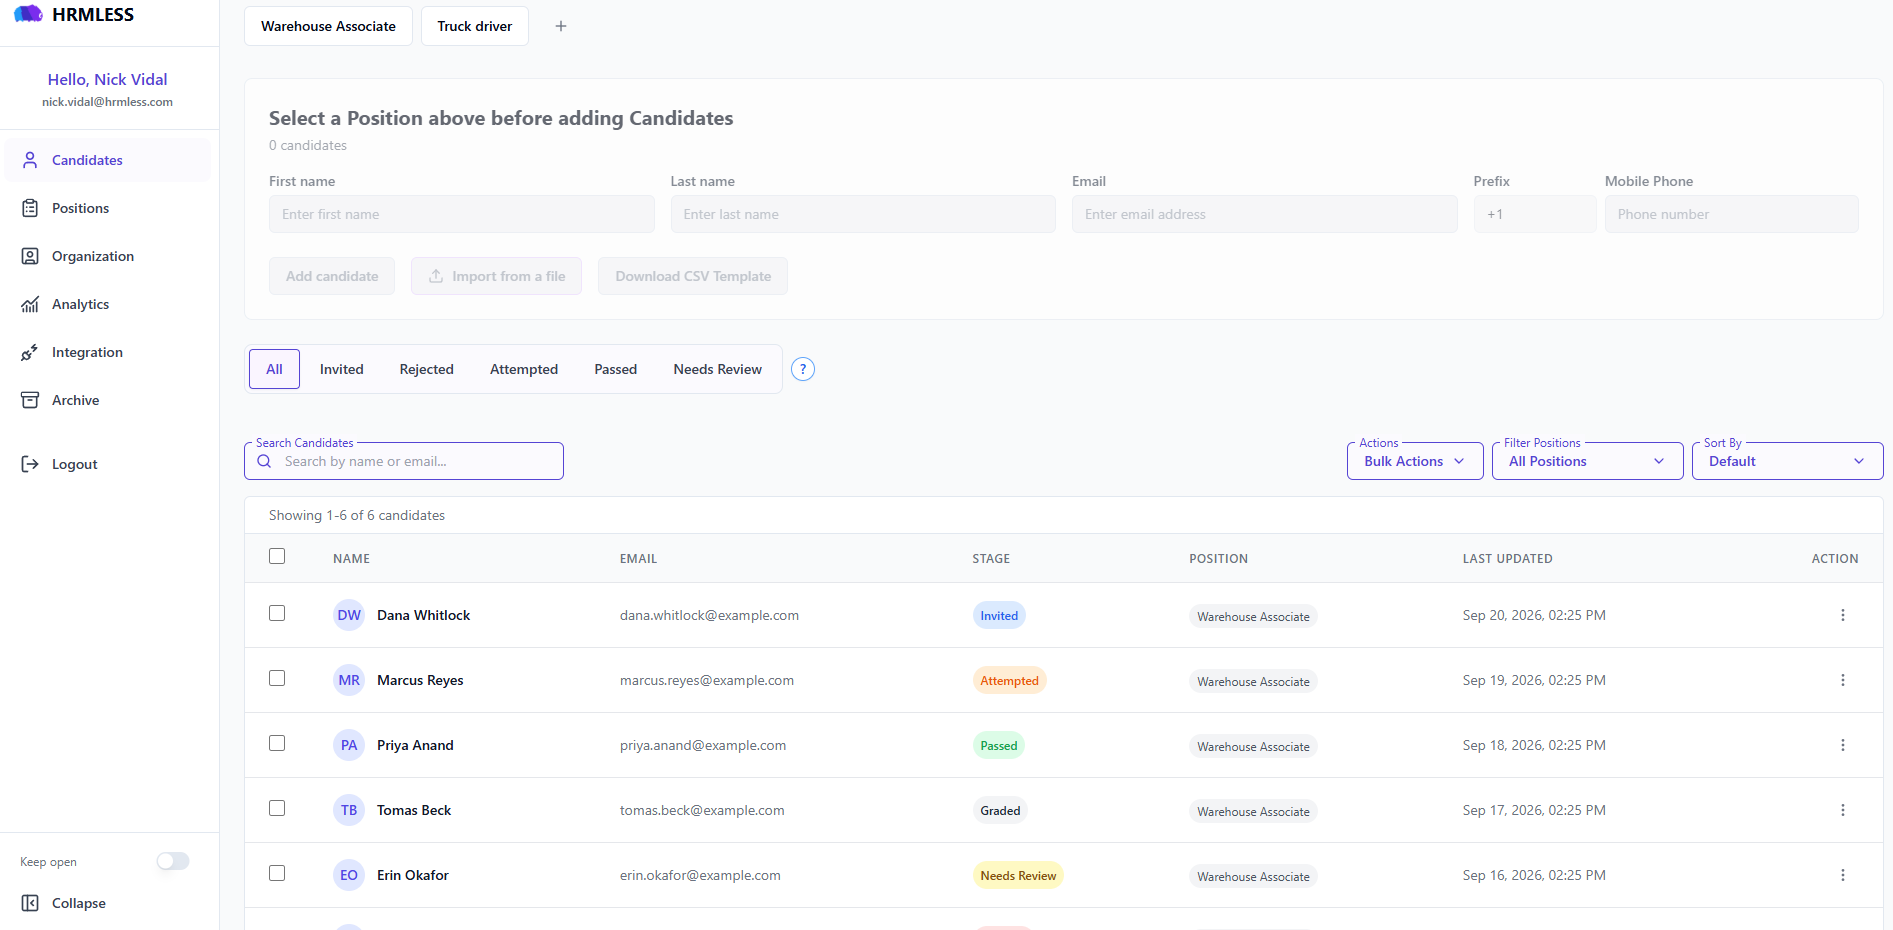
| Menu item | What it is |
|---|---|
| Candidates | Everyone who has applied, and where they are up to |
| Positions | The roles you are hiring for |
| Organization | Your company details, messages and billing |
| Analytics | How your hiring is going |
| Integration | Connect your ATS |
| Archive | Candidates you have put aside |
5. Create your first position
A position is a role you are hiring for. It holds the interview questions and the score you want to use as a cut-off.
You need one before you can add candidates — the Candidates page will say Select a Position above before adding Candidates until you have one.
See Create a position.